Multi-repo vs. Mono-repo: A Practical Guide (with Source Code)
Repository Management Approaches
Multi-repo
Short for Multiple Repositories.
In a multi-repo setup, every project or component lives in its own version control repository. Key traits:
- Each project has its own codebase and its own commit history
- Projects stay isolated and can use different frameworks, languages, or stacks
- Stronger code isolation, since each repo is independent
- Works well for large projects or organizations with multiple independent teams
Most product codebases are multi-repo by default. The pain shows up when you need to develop several libraries that depend on one another — coordination across repos gets painful fast. Take React: the project includes the React core, React DOM, and React Native, and these modules share a lot of code and dependencies. With a mono-repo, they all live in one codebase, which kills duplication and makes shared code easy to reuse. Let’s take a closer look at mono-repo.
Mono-repo
Short for Monolithic Repository.
A mono-repo holds multiple projects or components in a single version control repository. Key traits:
- All projects share one codebase and one commit history
- Encourages code sharing and centralized management
- Simplifies dependency management
- Works well for small-to-medium projects or related projects that need tight integration
As mentioned, projects like React are a near-perfect fit for a mono-repo. That said, mono-repos come with real downsides:
- Performance: as the repo grows, pulling code that spans many functions and contexts can get slow. This hits new contributors and CI/CD (Continuous Integration / Continuous Deployment) pipelines hardest.
- Hard to do fine-grained access control: in large organizations, enforcing per-package permissions inside a single repo is tricky and can create security risk.
- Tech-stack pressure: mono-repos tend to nudge teams toward a unified stack, which can stop a given project from picking the tool best suited for the job.
So it’s worth thinking carefully before committing to a mono-repo. With that out of the way, let’s build one.
Mono-repo in Practice
You can pick a tool along a simplicity-vs.-power axis.
Lightweight tools:
- npm workspaces: https://docs.npmjs.com/cli/v7/using-npm/workspaces
- Yarn workspaces: https://classic.yarnpkg.com/lang/en/docs/workspaces/
- pnpm workspaces: https://pnpm.io/workspaces (further reading: https://juejin.cn/post/7127295203177676837)
Heavier-duty tools:
- Lerna: https://www.lernajs.cn/ — originally created by Sebastian McKenzie (also the author of Babel). Now maintained by the open-source community, with contributors from many of the major tech companies.
- Nx: https://nx.dev/ — built and maintained by Nrwl, a company focused on enterprise-grade developer tooling, founded by ex-Googlers Victor Savkin and Jeff Cross.
- Turborepo: https://turborepo.org/ — started as a personal project by Jared Palmer. Vercel acquired it in 2021 and now drives its development. Vercel is best known for the Next.js framework.
- Bazel: https://bazel.build/about/intro?hl=en — built and maintained by Google. It grew out of Google’s internal build tool Blaze, which was open-sourced and renamed. Google’s massive internal mono-repo gave Bazel a deep well of real-world experience to draw on.
- Rush: https://rushjs.io/ — a scalable mono-repo manager from Microsoft.
Lightweight: pnpm Workspaces
For a personal project, pnpm is plenty. Here’s the quickstart.
1) Create a folder
mkdir mono-repo-pnpmcd ./mono-repo-pnpm2) Initialize pnpm
pnpm init3) Set up pnpm-workspace.yaml and shared linting/formatting
See the docs: https://pnpm.io/pnpm-workspace_yaml. Create a new pnpm-workspace.yaml:
packages: - 'packages/*'This tells pnpm that everything under packages/ is a sub-project of the mono-repo. That’s the entire base configuration — done.
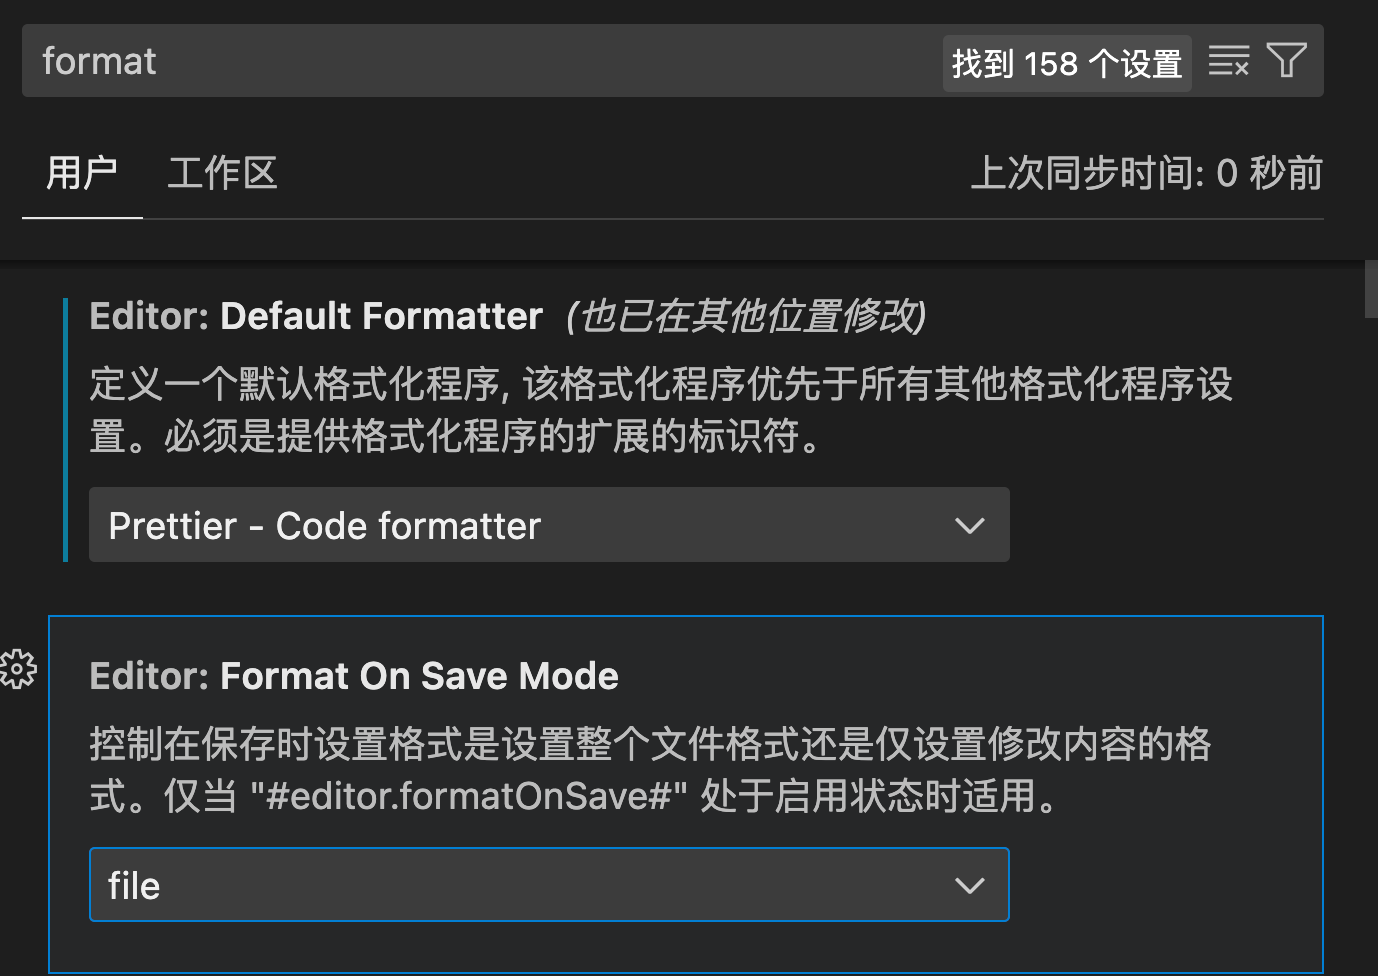
Now let’s set up shared code formatting so every sub-package follows the same rules. Make sure your editor has the ESLint and Prettier extensions installed and enabled first:
Then install ESLint:
pnpm i eslint -D -w-w is short for --workspace-root — it installs the dependency at the root, where it’s shared by every sub-module. You can also use -r to install across every sub-module recursively, or --filter <package_name> to target a specific one. Next, initialize ESLint with npx eslint --init (it’ll ask a few questions and generate an eslint.config.mjs for you). You may run into a warning like this:
WARN Issues with peer dependencies found.├─┬ @typescript-eslint/parser 7.14.1│ └── ✕ unmet peer eslint@^8.56.0: found 9.6.0└─┬ typescript-eslint 7.14.1 ├── ✕ unmet peer eslint@^8.56.0: found 9.6.0 └─┬ @typescript-eslint/eslint-plugin 7.14.1 ├── ✕ unmet peer eslint@^8.56.0: found 9.6.0 ├─┬ @typescript-eslint/utils 7.14.1 │ └── ✕ unmet peer eslint@^8.56.0: found 9.6.0 └─┬ @typescript-eslint/type-utils 7.14.1 └── ✕ unmet peer eslint@^8.56.0: found 9.6.0The fix is to install a matching ESLint version: pnpm install eslint@^8.56.0 -D. The warning means the installed ESLint is newer than what its peer dependencies expect — pinning to a compatible version clears it up.
Next, install the TypeScript ESLint plugin and the Prettier deps:
pnpm i -D -w @typescript-eslint/eslint-plugin prettier eslint-config-prettier eslint-plugin-prettierNow create the config files. Start with .prettierrc.json:
{ "printWidth": 80, "tabWidth": 2, "useTabs": true, "singleQuote": true, "semi": true, "trailingComma": "none", "bracketSpacing": true}Then tsconfig.json:
{ "include": ["./packages/**/*"], "compileOnSave": true, "compilerOptions": { "target": "ESNext", "useDefineForClassFields": true, "module": "ESNext", "lib": ["ESNext", "DOM"], "moduleResolution": "Node", "strict": true, "sourceMap": true, "resolveJsonModule": true, "isolatedModules": true, "esModuleInterop": true, "noEmit": true, "noUnusedLocals": true, "noUnusedParameters": true, "noImplicitReturns": false, "skipLibCheck": true, "baseUrl": "./packages" }}Then update eslint.config.mjs:
import pluginJs from '@eslint/js';import globals from 'globals';import tseslint from 'typescript-eslint';
export default [  { files: ['**/*.{js,mjs,cjs,ts}'] },  { languageOptions: { globals: globals.browser } },  pluginJs.configs.recommended,  ...tseslint.configs.recommended,  {    env: {      browser: true,      es2021: true,      node: true    },    extends: [      'eslint:recommended',      'plugin:@typescript-eslint/recommended',      'prettier',      'plugin:prettier/recommended'    ],    parser: '@typescript-eslint/parser',    parserOptions: {      ecmaVersion: 'latest',      sourceType: 'module'    },    plugins: ['@typescript-eslint', 'prettier'],    rules: {      'prettier/prettier': 'error',      'no-case-declarations': 'off',      'no-constant-condition': 'off',      '@typescript-eslint/ban-ts-comment': 'off'    }  }];
You’ll now get inline lint errors and format-on-save out of the box. Add a lint script to package.json:
"lint": "eslint --ext .ts,.js,.jsx,.tsx --fix --quiet ./packages"4) Create the sub-projects
Create two sub-packages:
mkdir -p packages/common packages/appInitialize each one:
cd packages/commonpnpm initcd ../apppnpm initcd ../..Update each sub-project’s package.json — these names are how the packages are imported and signal that they belong to the mono-repo-pnpm workspace:
{ "name": "@mono-repo-pnpm/app", ...}// packages/common{ "name": "@mono-repo-pnpm/common", ...}5) Add some shared code in the common package
In packages/common/index.js:
console.log('common.js was loaded');exports.sayHello = (name) => `Hello, ${name}!`;6) Use the common package from the app package
First, declare the dependency in packages/app/package.json:
{ "dependencies": { "@mono-repo-pnpm/common": "workspace:*" }}Then import it from packages/app/index.js:
const { sayHello } = require('@mono-repo-pnpm/common');console.log(sayHello('Monorepo'));This is also a chance to confirm the shared lint/format setup is working — if your code violates the rules, you’ll see a warning, and saving will reformat it automatically.
7) Run it
In the terminal: node ./packages/app. You should see:

That’s mono-repo’s local-dependency story in action. Without a mono-repo, you’d typically reach for npm link — and that gets messy quickly.
8) Install a dependency like lodash at the root, and any sub-project can pull it in via "lodash": "*". This lets the root manage shared dependencies for the whole workspace.
9) Add a script like "dev": "node index.js" to each sub-project’s package.json, then run pnpm -r dev from the root. One command runs the dev script in every sub-project.
This basic setup already gives you the core capabilities of a mono-repo:
- Workspace management: easily manage multiple packages via
pnpm-workspace.yaml. - Shared dependencies: sub-projects share dependencies, saving disk space.
- Local linking: reference local packages with the
workspace:*syntax. - Unified version management: manage every package from the root.
- Parallel execution: run scripts across multiple packages in parallel.
Heavy-duty: Turborepo
OS: macOS. Some steps may differ on Windows.
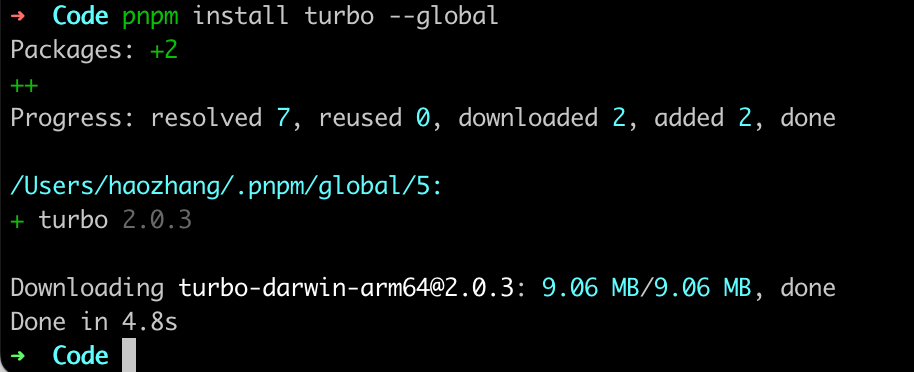
Install Turbo globally with pnpm install turbo --global. If you hit this error:

don’t panic — let’s walk through the fix. The cause is that pnpm’s environment variables and global directory aren’t set up yet.
1) First, run pnpm setup as the prompt suggests, then try the global install again. If you still see the same error, or something like this:

2) Open ~/.bashrc (or ~/.zshrc) with nano ~/.bashrc / nano ~/.zshrc and add:
export PNPM_HOME="$HOME/.pnpm"export PATH="$PNPM_HOME:$PATH"Save with Ctrl + O (press Enter when prompted to confirm), then exit with Ctrl + X. Reload your shell config:
source ~/.bashrc # or: source ~/.zshrcVerify the setup:
# Confirm the env vars are setecho $PNPM_HOMEecho $PATH# Confirm PNPM_HOME exists and lists pnpm's globally installed packagesls $PNPM_HOMEIf both run cleanly, you’re good. Re-run the global Turbo install — it should succeed this time:
3) With Turbo installed globally, scaffold a project: npx create-turbo@latest.
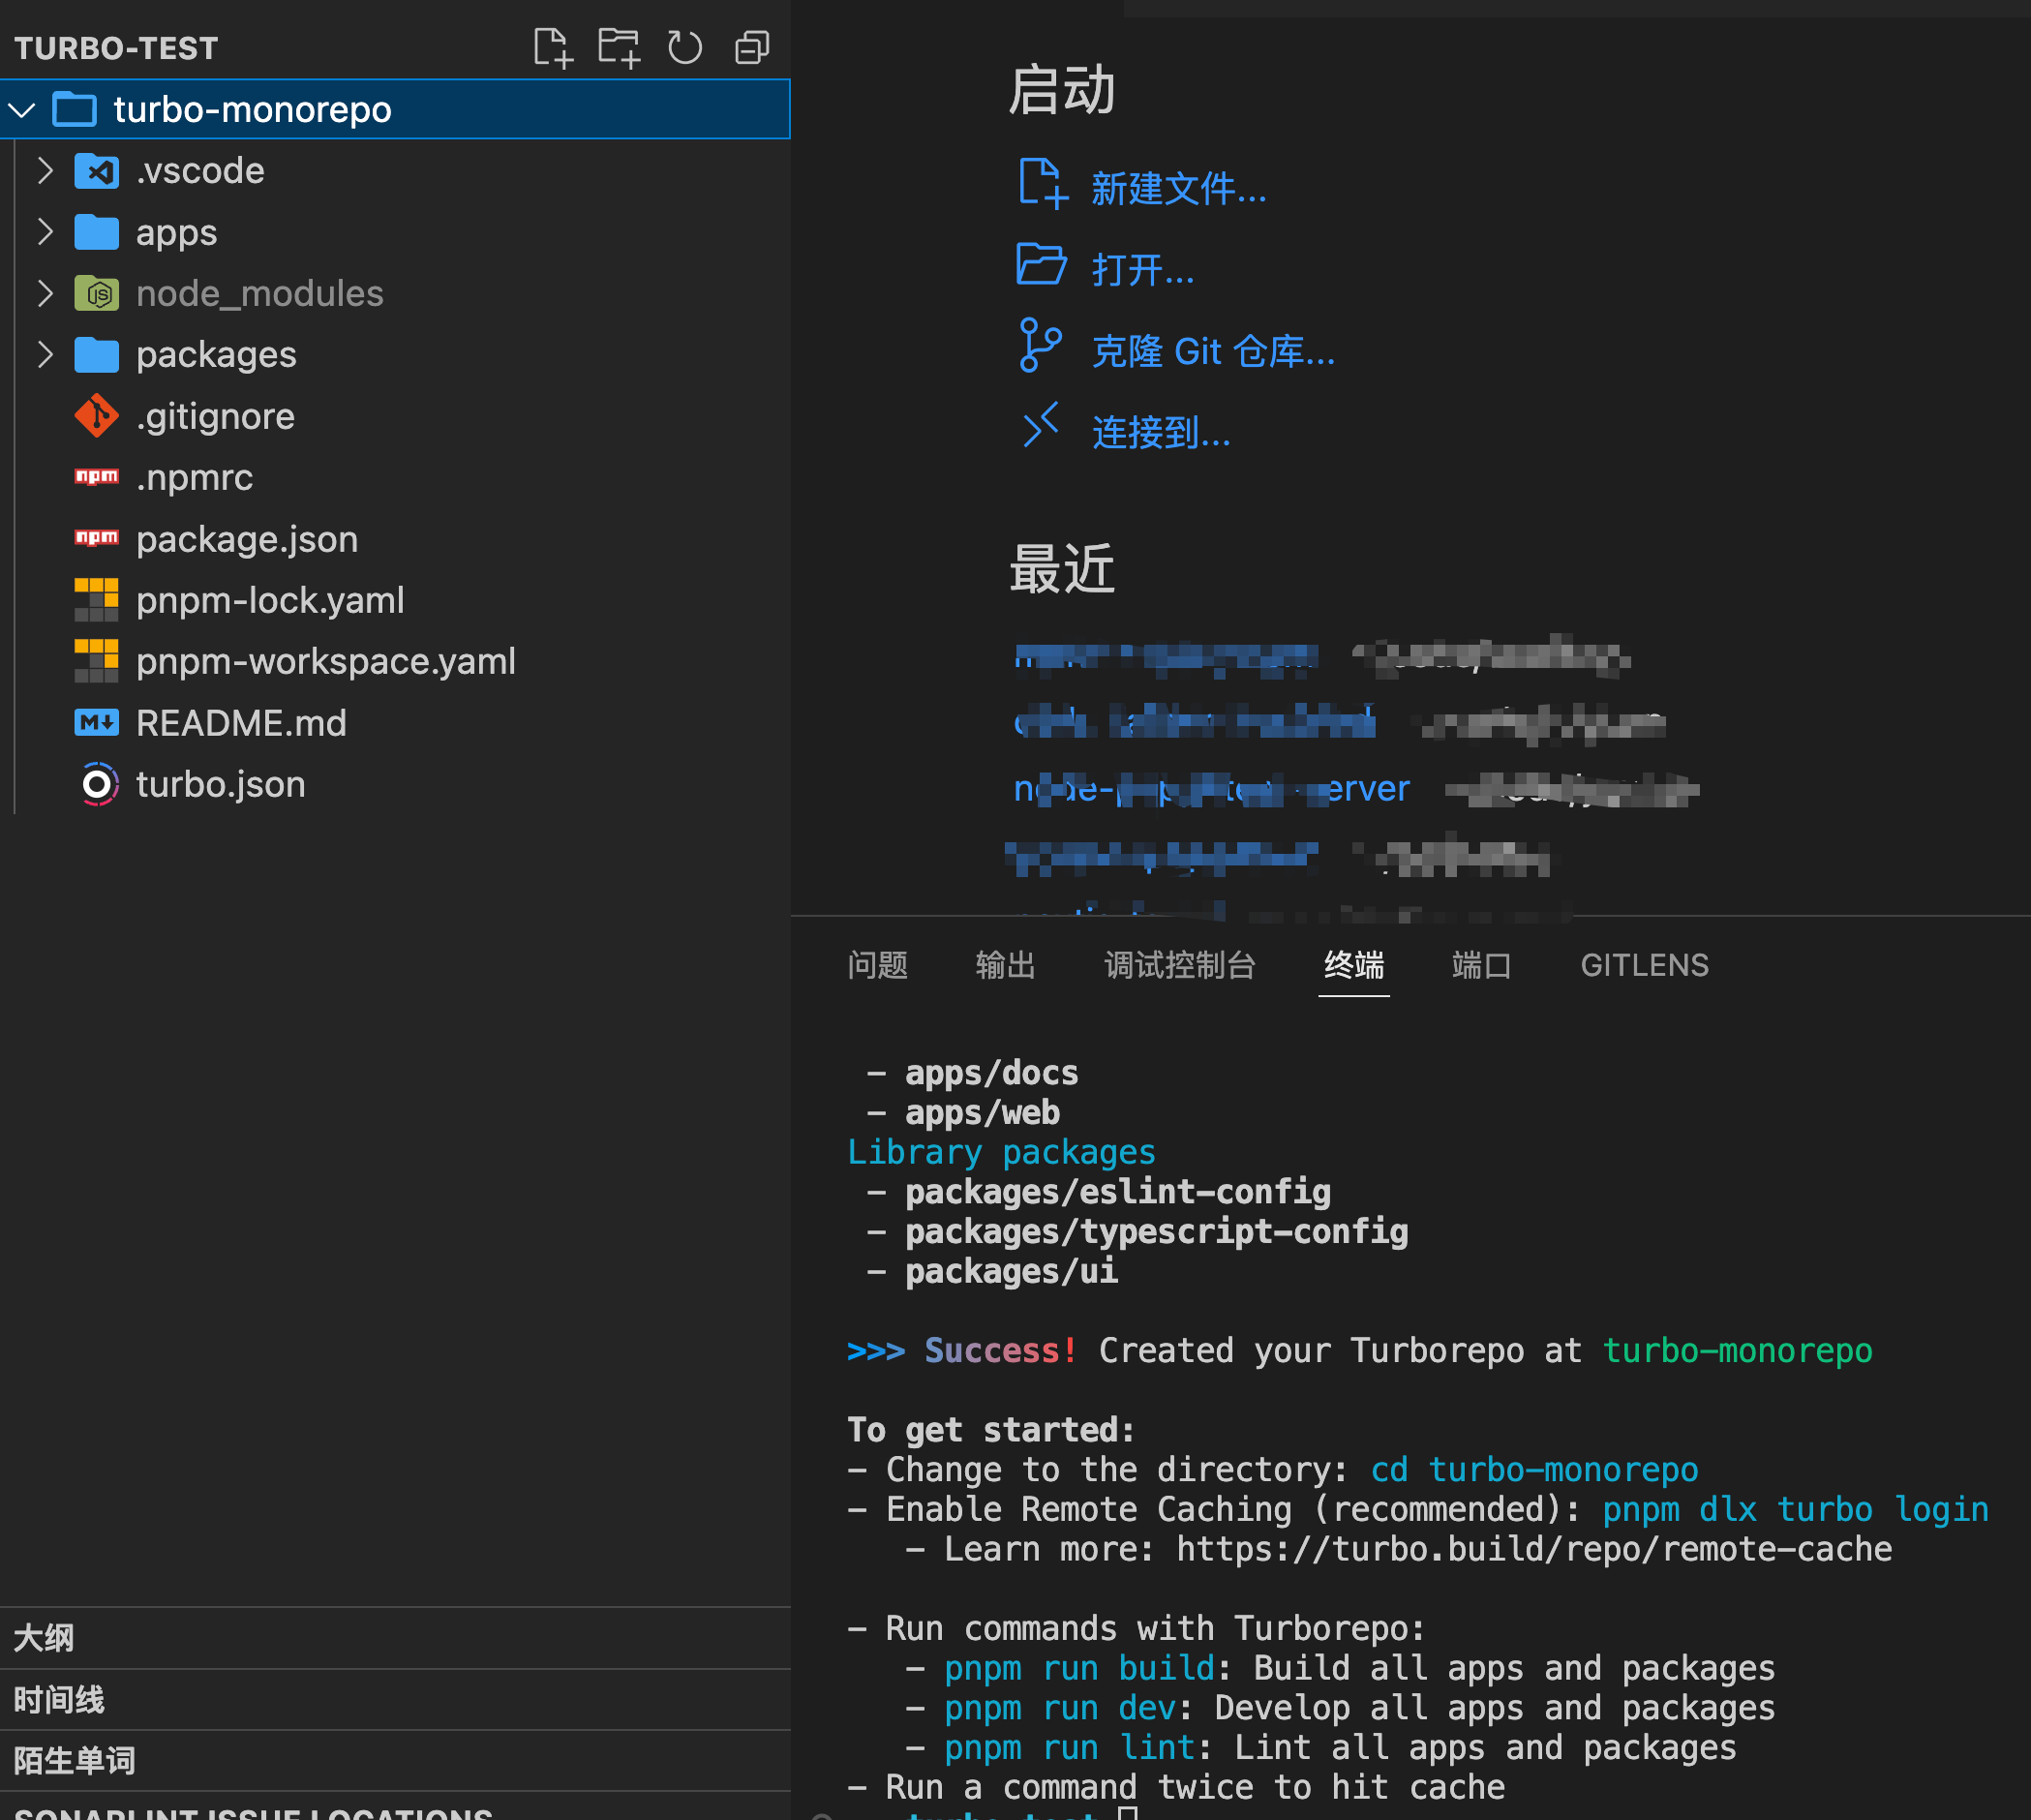
4) Get a feel for the project layout. Turborepo is built to handle the build-performance problems that hit larger mono-repos:
my-turborepo/├── apps/│ ├── docs/│ └── web/├── packages/│ ├── eslint-config-custom/│ ├── tsconfig/│ └── ui/├── turbo.json└── package.json5) turbo.json is Turbo’s central config file. It defines how tasks relate to one another:
{ "$schema": "https://turbo.build/schema.json", "tasks": { "build": { "dependsOn": ["^build"], "inputs": ["$TURBO_DEFAULT$", ".env*"], "outputs": [".next/**", "!.next/cache/**"] }, "lint": { "dependsOn": ["^lint"] }, "dev": { "cache": false, "persistent": true } }}"$schema": points at the JSON schema so editors can validate the config."tasks": declares the project’s tasks."build":"dependsOn": ["^build"]: this task depends on thebuildtask in each of its package’s dependencies. The^means “upstream dependencies only.”"inputs": ["$TURBO_DEFAULT$", ".env*"]: declares the task’s inputs.$TURBO_DEFAULT$is Turbo’s default input set;.env*adds every.envfile."outputs": [".next/**", "!.next/cache/**"]: declares the task’s outputs — everything under.nextexcept.next/cache.
"lint":"dependsOn": ["^lint"]: depends on thelinttask of every upstream dependency.
"dev":"cache": false: caching disabled."persistent": true: marks this as a long-running task (e.g. a dev server).
6) From the root, run turbo run build. Turbo will build every app and package in parallel based on turbo.json. Run it twice and you’ll see the second run finish much faster — that’s incremental builds and the build cache doing their job.
To wrap up, the headline capabilities of Turbo:
- Incremental builds: only rebuilds what actually changed.
- Remote caching: share the build cache across the team.
- Parallel execution: tasks run in parallel for better throughput.
- Task orchestration: dependencies between tasks live in
turbo.json. - Single source of truth: one
turbo.jsonconfigures the whole monorepo.
References
- vivo Tech: Best practices for managing packages in a Lerna-based monorepo
- Turbo, the up-and-coming monorepo solution: https://segmentfault.com/a/1190000042282389
- My pnpm mono-repo example: https://github.com/chaseFunny/pnpm-monorepo
- My Turbo example: https://github.com/chaseFunny/turbo-monorepo